Organization Management
You can use the Organization Management user interface (UI) to perform administrative tasks within Chef 360 Platform (including User and Role Management).
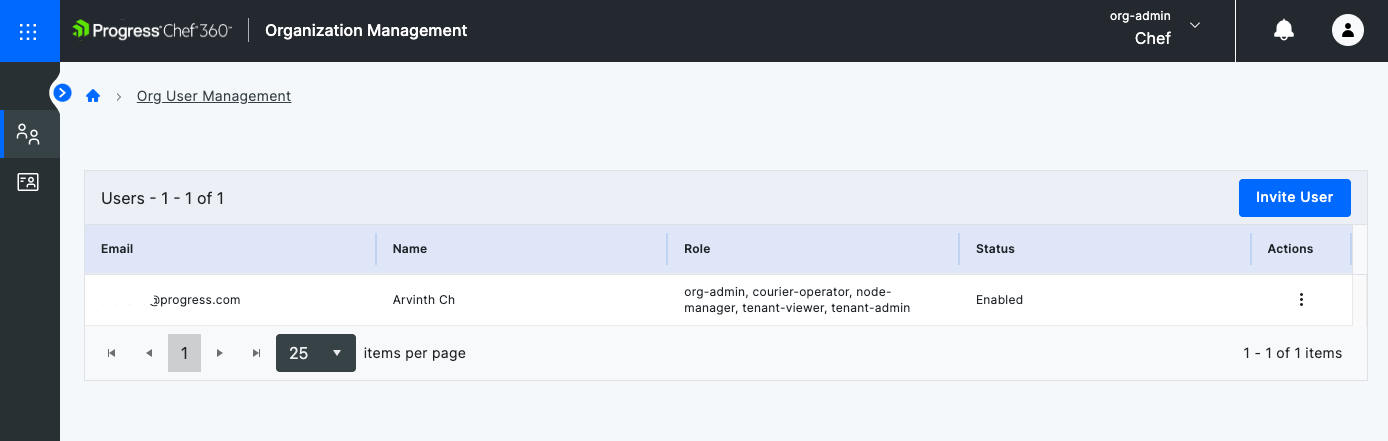
User Management
All of the organizations are visible on the User Management screen. The Users table contains the Email, Name, Role, Status, and Actions columns.
Invite user
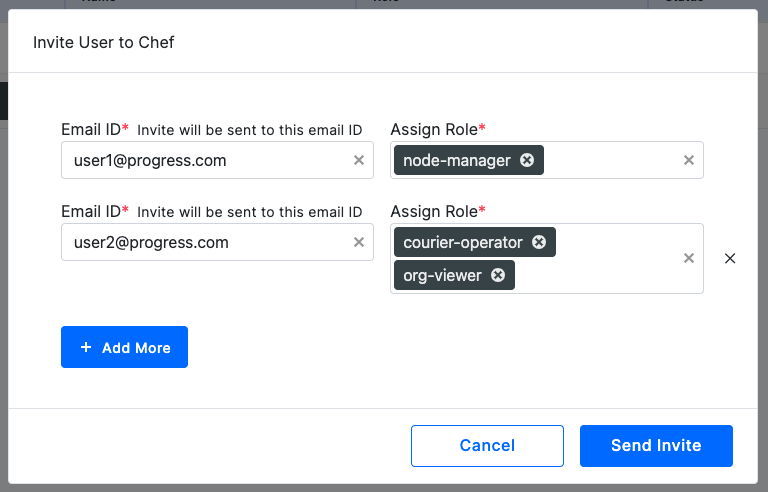
To invite new users to view the organization, follow these steps:
Select Invite User.
Enter the user’s email address in the Email ID text box.
In the Assign Role field, select the required role (or roles). The role determines the user’s permissions. You can add more than one role for a user.
Select +Add More to invite more users.
Select Send Invite to invite the users.
Disable/Remove a user
Using the actions menu in the Actions column, you can perform the following actions:
- Update Role
- Disable User
- Remove User
Update a role
To update a user’s role, follow these steps:
Select the three dots in the Actions Column.
Select Update Role.
Add or remove roles in the New Role column.
Select Save.
Disable a user
To disable the user, follow these steps:
Select the three dots in the Actions Column.
Select Disable.
Select Disable User.
The disabled user won’t have access to Chef 360 Platform. You can enable the user to provide them with access again, if required.
Remove a user
To remove a user, follow these steps:
Select the three dots in the Actions Column.
Select Remove.
Select Remove User.
The removed user won’t have access to Chef 360 Platform. You can add the user again to provide them with access, if required.
Once you have performed the action, the organization user management table will be updated.
View user details
To view a user’s details, select the user. The page shows the user’s Email ID, Name, and Roles. Buttons at the top right of the page allow you to remove or disable a user, or update a user’s role.
Role management
The Role Management page shows all the existing roles. The table shows the Role Name, Type, Status, and Actions columns.
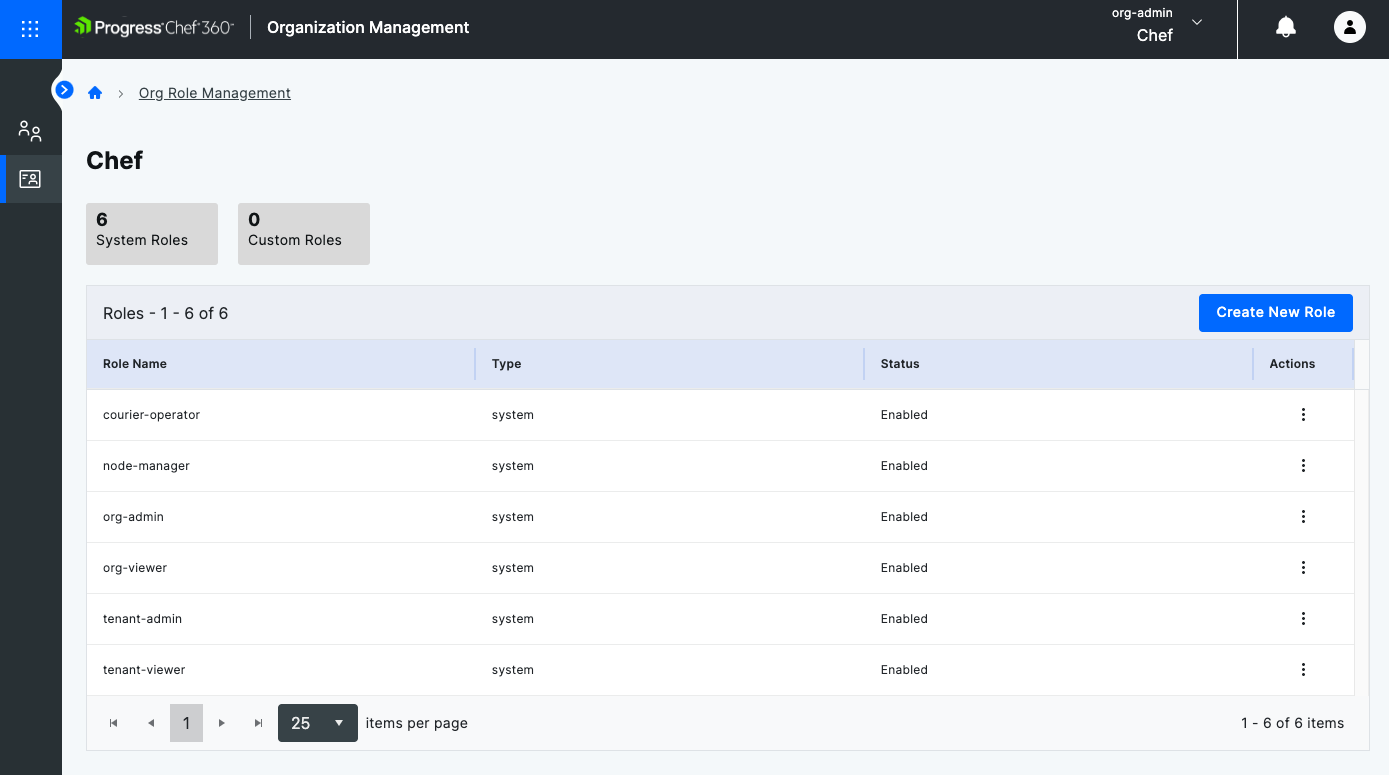
Roles in Chef 360 allow you to adopt predefined system roles or create your own custom roles.
System roles
Chef 360 has six default roles. These are:
tenant-admintenant-viewerorg-adminorg-viewernode-managercourier-operator
tenant-admin role
The tenant-admin role is only given to the first user of the organization. The tenant-admin role user has all permissions in a tenant and is able to perform all actions, such as:
- Add, update, and delete users.
- Create, update, delete, enable, and disable organizations.
- Enrol nodes.
- Create and manage node lists and filters.
- Create and run Courier jobs.
- View job run details.
- Create new tenants.
- Perform tenant-level actions in the system.
- View the list of organizations present under a tenant.
- View all users within a tenant and perform actions under it.
- Load licenses.
tenant-viewer role
The tenant-viewer role is similar to the tenant-admin role, but with limited permissions. The tenant-viewer role user can only view the tenant and its organizations, and can’t edit or change them.
org-admin role
Theorg-admin role user has permission to:
- Create a new organization.
- Invite new users to the organization.
- Create new roles and policies.
org-viewer role
The org-viewer role is similar to the org-admin role but only provides view access. The org-viewer role user can’t edit or change the organization.
node-manager role
The node-manager role user has permission to:
- Perform enrollment.
- View their nodes.
- Create new filters and node lists.
courier-operator role
The courier-operator role user has permission to:
- Run everything in Courier. For example, create a job and view previous jobs.
- View nodes in node management.
- Save a Node List.
- Create Courier jobs.
Custom roles
To create a custom role, follow these steps:
Select Create New Role.
Enter a name for the role in the Role Name text box.
Select Include Policy.
Select the policies to include.
Select Include Selected.
Select Save.
Delete or disable a role
Click the three dots in the Actions column to disable or delete a role.
Disable a role
To disable the role, follow these steps:
Select the three dots in the Actions Column.
Select Disable.
Select Disable Role.
Delete a role
To delete the role, follow these steps:
Select the three dots in the Actions Column.
Select Delete Role.
Once you have performed the action, the organization role management table will be updated.
View role details
To view details of a particular role, select it in the table. The Role Details page shows the policy details for the role. The Policies table contains the PolicyName, Type, and Status.