Install CLIs and register your workstation
This page documents how to download and install the Chef 360 SaaS CLIs and register your workstation with your Chef 360 SaaS deployment.
Prerequisites
- Chef 360 SaaS is configured.
/usr/local/binis present in the PATH environment variable.
Install CLIs
Follow these steps to download and install the Chef 360 CLIs:
From the Chef 360 SaaS home page, select Download Centre.
From the Download Centre page, follow the instructions to download and install each CLI tool.
After the CLIs are installed, run each CLI with the
--helpflag to verify that it’s installed:chef-courier-cli --helpchef-platform-auth-cli --helpchef-node-management-cli --help
Install and configure the bash-completion package
Each Chef 360 SaaS CLI has a completion bash subcommand. You must install the bash-completion package to run these subcommands.
To install and configure the bash-completion package, follow these steps:
Install the bash-completion package.
To install the bash-completion package on Linux systems, use the APT or Yum package manager:
sudo apt-get install bash-completionor
sudo yum install bash-completionTo install the bash-completion package on macOS, use Homebrew:
brew install bash-completionConfigure your Bash shell.
To load the bash-completion package in every shell session by default, you must enable it in the
.bash_profileor.bashrcfile.To enable it on Linux systems, add the following lines to the
.bash_profileor.bashrcfile:if [ -f /etc/bash_completion ] && ! shopt -oq posix; then . /etc/bash_completion fiTo enable it on macOS, add the following lines to the
.bash_profileor.bashrcfile:if [ -f $(brew --prefix)/etc/bash_completion ]; then . $(brew --prefix)/etc/bash_completion fior
if [[ -r "$(brew --prefix)/etc/profile.d/bash_completion.sh" ]]; then
    . "$(brew --prefix)/etc/profile.d/bash_completion.sh"
fi
Verify profiles
Use these commands to verify your profiles and credentials.
List all your profiles with the
list-profile-namessubcommand. For example:chef-platform-auth-cli list-profile-namesThe response is similar to the following:
List of available profile names:
  1. tenant1
  2. default
You can use
list-profile-namessubcommand with any of the Chef 360 SaaS CLIs to get a list of your profiles.Get details of your default profile using the
get-default-profilesubcommand:chef-platform-auth-cli get-default-profileThe response is similar to the following:
Default profile:

[default]
DeviceId = "ac:de:48:00:11:22-admin-chef-courier-cli"
Url = "http://tenant-1.dev-360.example.com"
OrgName = "Test OU1"
RoleName = "org-admin"
AccessKey = "FIT3SXM...YK4V05Y"
SecretKey = "Cwaygh4FqE2s...p9IE9YpzoGuX"
Cafile = ""
Insecure = true
You can use
get-default-profilesubcommand with any of the Chef 360 SaaS CLIs to get your default profile.
Assign the Node Manager and Courier Operator roles
The node-manager and courier-operator roles allow you to manage nodes, manage skills on nodes, and run Chef Courier jobs.
Before you begin, ensure you have:
- Your user ID. Use the
user-account identity get-self-usersubcommand to get your user ID. - The name of a profile with the org-admin role.
Follow this step to give your user account the node-manager and courier-operator roles:
Assign the
node-managerrole andcourier-operatorrole using theuser-account user assign-rolesubcommand:chef-platform-auth-cli user-account user assign-role --body '{"name": "node-manager", "roleId": "6e7df273-928b-41ec-b6f6-e3f5138a6f9e"}' --userId <USER_ID> --profile <ORG_ADMIN_PROFILE_NAME>chef-platform-auth-cli user-account user assign-role --body '{"name": "courier-operator", "roleId": "ac12c3a6-95f7-429d-b3fc-584ce1cf74de"}' --userId <USER_ID> --profile <ORG_ADMIN_PROFILE_NAME>Replace:
<USER_ID>with your user ID.<ORG_ADMIN_PROFILE_NAME>with your profile that has the org-admin role.
Create profiles for the Node Manager and Courier Operator roles
Create a profile for each role that you added to your user account in the previous step.
To create a profile, follow these steps:
Create a profile using the
register-devicesubcommand that associates your workstation with a specific tenant, organization, and role:chef-platform-auth-cli register-device --device-name <WORKSTATION_NAME> --profile-name <PROFILE_NAME> --url <TENANT_URL>Note
If you’ve configured Chef 360 SaaS with a system-generated or custom certificate in the API/UI settings, use the following CLI arguments:
- If you don’t have the root certificate authority, use the
--insecureflag. This flag skips certificate validation. - If have the root certificate authority present, use the
--cafile <ABSOLUTE_PATH_TO_ROOT_CA_FILE>flag.
Replace:
<WORKSTATION_NAME>with a name for the workstation.<PROFILE_NAME>with a profile name for the role that this profile will use. For example, add thecourier-operatorprofile name for thecourier-operatorrole.<TENANT_URL>with the tenant URL, for examplehttps://chef360.example.com:31000.
The CLI responds with an authorization code that includes a link to log into Chef 360 SaaS.
Device Id :  ac:de:48:00:11:22-admin-chef-courier-cli
Device Name : <DEVICE_NAME>
OAuth Code : <AUTHORIZATION_CODE>

Please log in and authorise the the device by using the link below:
https://chef360.example.com/platform/user-accounts/v1/identity/device/ac:de:48:00:11:22-admin-chef-courier-cli/authorise?oauthCode=<AUTHORIZATION_CODE>&appType=chef-courier-cli&deviceName=<WORKSTATION>

Is the device authorised? (y or n)
Paste the link into your browser and log in. The CLI waits for the device registration process to finish in the browser.
- If you don’t have the root certificate authority, use the
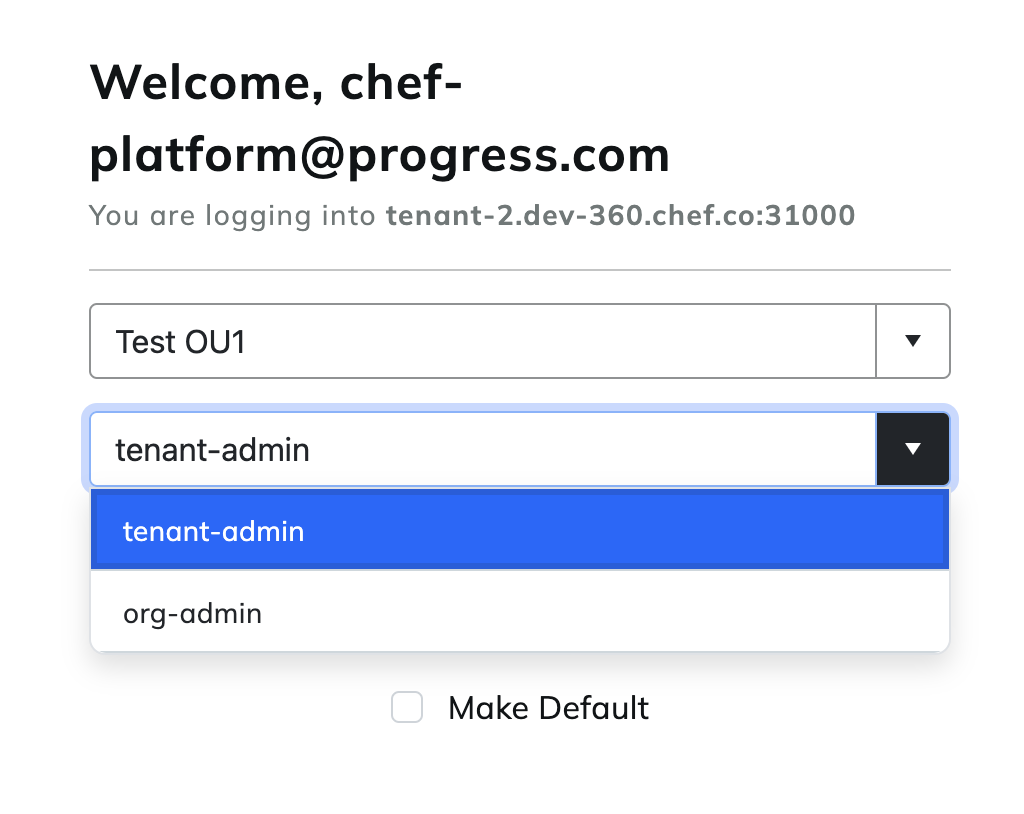
Open a browser, navigate to the link returned by the CLI, and log in if you haven’t already.
Select the organization and role you would like to link to this profile and select Submit.
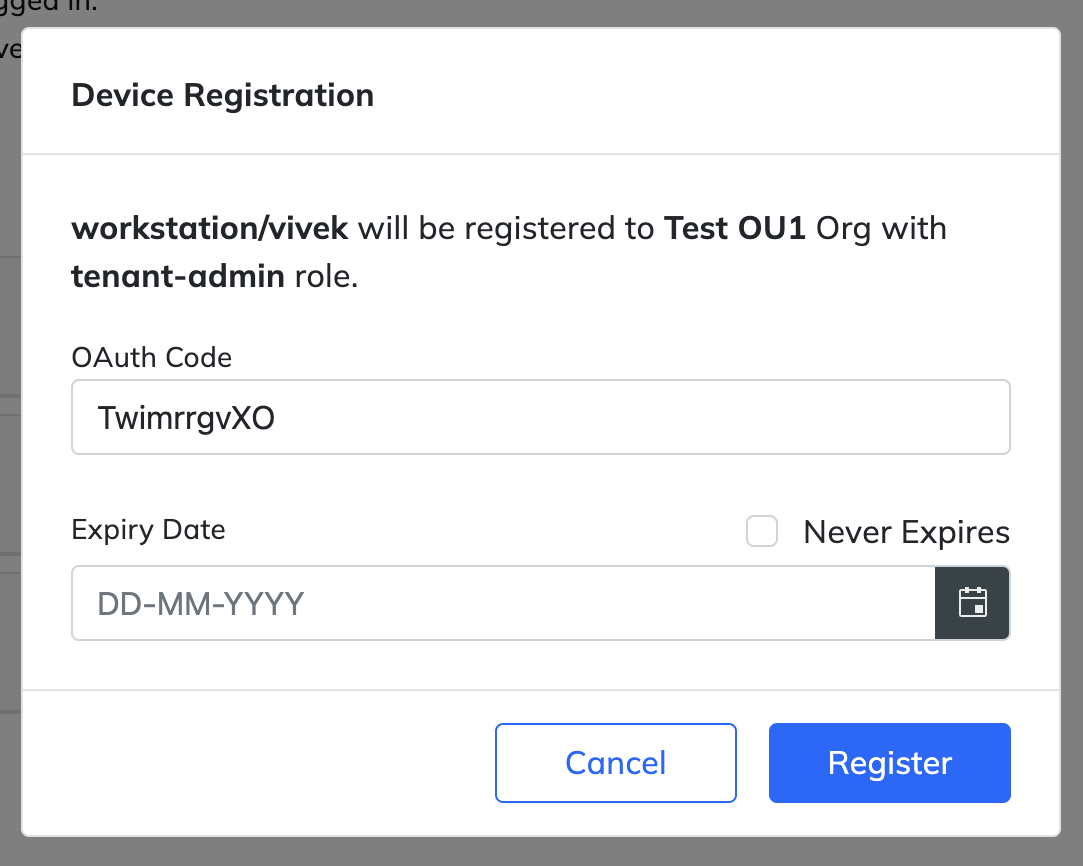
On the Device Authorization screen, Chef 360 SaaS shows your OAuth code and you can select an expiration date for your session.
Chef 360 SaaS automatically refreshes your access token up to this expiration date.
After entering this information, select Authorize.
Return to your terminal and enter
yto continue.The CLI displays your device profile and your workstation is authorized to access Chef 360 SaaS services.
Is the device authorised? (y or n)
> y
Profile:

[tenant-org-role]
DeviceId = "ac:de:48:00:11:22-admin-chef-courier-cli"
Url = "https://demo.chef360.io/"
OrgName = "Demo Organization"
RoleName = "org-admin"
AccessKey = "FIT3SXM...TCYK4V05Y"
SecretKey = "Cwaygh4FqE2sT...rX4wBu0hp9IE9YpzoGuX"

Device registered successfully
Optional: Test your connection by getting the role associated with your user account:
chef-platform-auth-cli user-account self get-role --profile <PROFILE_NAME>Replace
<PROFILE_NAME>with the name of your profile.Optional: Set your new profile as the default profile.
The Chef 360 SaaS CLIs use a default profile automatically in any command that accepts the
--profileargument. If you don’t set a default profile, you will have to specify it in each command with--profile <PROFILE_NAME>.Set a default profile:
chef-platform-auth-cli set-default-profile <PROFILE_NAME>Replace
<PROFILE_NAME>with the name of the default profile.Repeat this procedure so that you have separate profiles for the Node Manager and Courier Operator roles.